I am so excited to share this project with you.
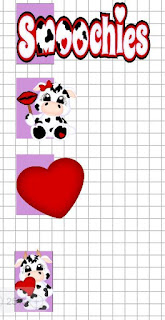
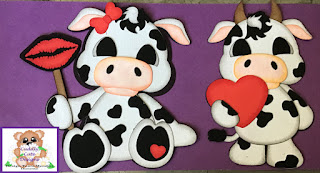
For this project, I used the file Smoochies.
This is a shape book that can be used to
share pictures with loved ones.
I am going to attempt to explain how to make
this book. I have 19 photos to share showing different
steps in making this book.
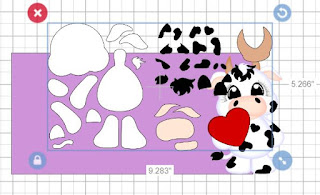
To begin with, you will be working with the PNGs in the file.
You could use them instead of paper piecing them but I am going to
show you how to do the paper piecing ones.
You may want to enlarge the photos by clicking on them to see some
of the sizes I used.
I made my book 5 inches tall by 11.5 inches long.
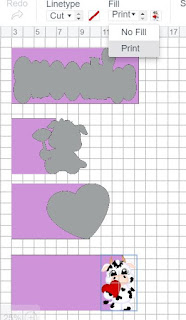
You will need to load all the SVGs and PNGs into Design Space.
- Put some rectangles on the canvas. They should be 5 inches tall.
- Size each triangle's width to the length you desired them without changing their height. I make them so that they are graduated and the pieces behind them can be seen.
- Size the PNGs to your desired size. They should be 5 inches tall.


- You can make them longer or shorter by adjusting their sizes as you would any other shape you add to the canvas. Keep in mind that with the rectangle and PNG, the total size cannot be more than 11.5 inches to fit horizontally in Design Space so that a 12 x 12 piece of cardstock can be used.
- Duplicate the PNGs
- Set one set aside.
- Take each of the PNGs that you did not set aside and change them to a cut with no fill. This will change them so the PNGs are not the printed version of them.
-
- Duplicate each of those changed PNGs. Set one set aside.
- Align the duplicated PNGs (without fill)with the bottom of the rectangle once they have been sized.
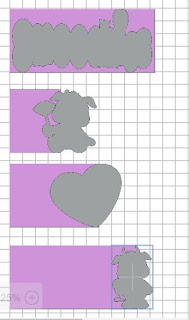
- Weld together once triangle and one plain PNG. You do not need to weld the title "Smoochies" to its rectangle.

- Set those pieces aside.
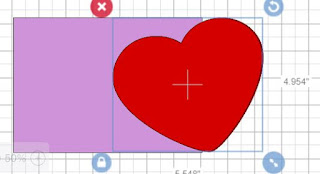
- Get the duplicated PNGs that you first set aside. You will now need to size you cut files with those as best as you can. No need to ungroup the files. Just align one of the cut pieces on top of the PNG and size to the same size. I used the heart and lips. DO NOT ungroup before sizing. If they are grouped, The pieces will all adjust to the right sizes needed for each of them.


- Save all your hard work.
- Make the PNGs invisible unless you want to print them to use on a different project.
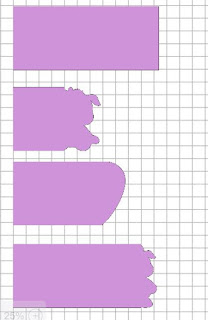
- Cut all the pieces even the pieces set aside. They will be used as bases so that you can glue the pieces so they will line up with the welded pieces.
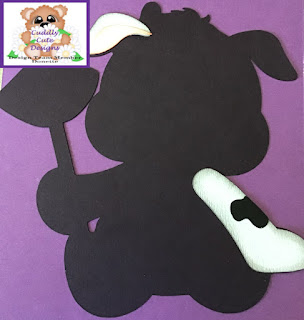
- If you do not use the bases you might end up with something like pictured below.
-
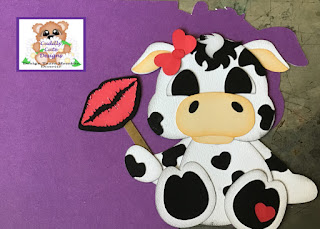
- Make sure you keep the bases and PNGs you sized with the same as the PNGs without fill or they will not line up right. If they don't line up right (as pictured below), you can do a bit of trimming.

- Whew! We did it (I hope I explained it so you could understand it.)
- Once you are finished, line up your pages and fasten them together with the way you would like. I usually punch holes in them and use ribbon to tie them together.


No comments:
Post a Comment